Contents
- What is Payline?
- Payline Access
- My User
- CRM Management
- Password Reset
- 2-Factor Authentication (2FA)
- SMS Authentication
- TOTP Authentication
- Login Troubleshooting
- View / Search Transaction Records
- Transaction Record Search
- Transaction Record Results
- Transaction Record
- Reporting
- Generate Report
- Processing Transactions
- PayMoto
- Processing a Refund
- Processing a Complete
- Batch Processing
- Recurring Billing
- Adding Cards
- One-Off Bill charge
- Setting up Recurring Billing
What is Payline?
Payline® is a browser-based payment application that can be used to process credit card transactions manually, process refunds, set up recurring payments and generate intelligent reports to aid with reconciliation and provide business intelligence.
It is most commonly used by organizations that requite a cost effective, quick, simple process for accepting credit card payments, and can also be scaled for call centers or organizations that require the ability to accept credit card payments in a card-not-present environment.
Payline Access
To access Payline, navigate to https://sec.windcave.com/pxmi3/logon and enter your username and password, then select Login.
Please note that no sensitive information is made available on any of these screens. Depending on your solution some of the data available in these screens will not be applicable.
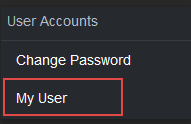
My User
Within your Payline login, you are able to update your settings to your preferences. From the navigation menu, select User Accounts > My User to view and update.
User information
| Field Name | Description |
|---|---|
| Card Mask Style | Controls how many digits are shown or masked (all PCI compliant) - Options are: DPS = Shows the first six and last two digits of the card number DPS 6..3 = Shows the first six and last three digits of the card number DPS 6..4 =Shows the first six and last four digits of the card number SITA = Shows only the last four digits of the card number |
| Date Format |
The date format that will display in your Payline pages Day-Month(Alpha)-Year = 18-MAY-2020 Day/Month/Year = 18/05/2020 Month(Alpha)-Day-Year = MAY-18-2020 Month/Day/Year = 05-18-2020 |
| Time Format | The time format that will display in your Payline pages 24Hour = 0200 or 1400 AMPM = 2AM or 2PM |
| Time Zone | The time zone that will determine how to display on your Payline pages |
| Report Format | The default format for report generation CSV = Comma-separated values file HTML = text-based file displayed on a webpage PDF = portable document format (read-only) XML = extensible markup language (plain-text file) |
| Language | The language that will display in your Payline pages |
Contact
| Field Name | Description |
|---|---|
| Full Name | The full name of the staff member assigned to the username |
| The email address assigned to the username
This is used for Payline features that require an email contact |
|
| SMS Number | The mobile phone number assigned to the username
This is used for Payline features that utilize sms/text |
| Enable Email | Allows emails to be sent from Payline (e.g. password changes, sending reports) |
| Enable SMS | Allows text messages to be sent to the number provided (e.g. 2FA Auth) |
| Language | The language that will display in your Payline pages |
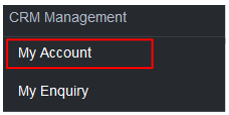
CRM management
Within your Payline login, you are able to view and update your CRM preferences. If you require but are unable to see this option, please contact your Windcave Account manager or email [email protected].
My Account
From the navigation menu, select CRM Management > My Account.
 General

| Field Name | Description |
|---|---|
| Id | The merchant identification number |
| Category | The category of Windcave services i.e. Ecommerce, Eftpos or Unattended |
| Legal Name | The merchant legal name |
| Company registration no. | The merchant company registration number |
| Trading name | The merchant trading name |
| Former Name | The merchant former legal name (if name has changed) |
| Description | The description of the merchant, i.e. Software Development, Retail Shop, etc. |
| Industry | The industry of the merchant, i.e. Information Technology, Brand name supermarket, etc. |
| Website | The merchant website url |
| Country | The country where the merchant is based |
| Business type | The business type of the merchant, i.e. Business, Leisure, etc. |
| Primary acquirer | The primary acquirer of the merchant, i.e. American Express |
Address
Provides address information for the merchant account.

| Field Name | Description |
|---|---|
| Address Type | The type of address, i.e. Postal or Physical |
| Address | The address of the merchant |
| Country | The country of the merchant |
The steps below allow you to add a new address or update an existing address:
Add a new address:- Select Add from the Address tab.
- Select the Address Type.
- Enter the details for Address1, City and Country
- (Optional) Enter any optional fields.
- Select Add to save.
The address will be added to the Address list.
Update an existing address:- To update an existing address, select the address from the list displayed.
- Update the required information.
- Select Update to save
The updated details will be displayed on the Address list.
Billing
Provides billing information for the merchant account.

| Field Name | Description |
|---|---|
| Company | The name of the billing company the merchant is using, i.e. Windcave |
| Payment Method | The type of billing the merchant is using, i.e. Direct Credit |
| Currency | The billable currency set-up for the merchant and used for all transaction types, i.e. New Zealand Dollar, Australia Dollar, etc. |
| Purchase order | The purchase order number related to the billing company |
| Invoice delivery type | The invoice delivery type used to the billing company |
Contacts
Provides contact information for the merchant account.

| Field Name | Description |
|---|---|
| First Name | The first name of the contact |
| Last Name | The last name of the contact |
| The email address of the contact | |
| Phone Number | The phone number of the contact |
| Type | The type of contact, i.e. Sales, Developer, etc. |
Merchants are able to update their authorized contacts' information by following the steps below.
- Select Add from the Contact tab.
- Enter the First Name, Last Name, Email, Contact Type and Phone No.
- (Optional) Enter any optional fields.
- Select Add to save.
The contact will be added to the Contact list.
Updated an existing contact:- From the contact tab list, scroll and select the contact to update.
- Update the required information.
- Select Update to save.
Select Delete to remove the contact.
The updated details will be displays on the Contact list, or if deleted, will no longer display on the contact list.
Contracts
Provides contract information for the merchant account

| Field Name | Description |
|---|---|
| Contract Id | The merchant contract identification number |
| Contract Type | The merchant contract type |
| Status | The status of the merchant contract |
Viewing or printing a contract:
- From the contracts tab list, select the line of the contract to view.
- Once viewed, select Cancel to return to the Account screen.
Select Download to save and print a copy of the contract.
Once completed, select Cancel to return to the Account screen.
Sub-Accounts
Provides sub-account information for the merchant account.
Sub-Account customers are separate customer records which are associated to the parent merchant customer record to aggregate charges.

| Field Name | Description |
|---|---|
| CustomerId | The merchant sub-contract customer identification number |
| Trading Name | The merchant sub-contract customer trading name |
| Legal Name | The merchant sub-contract customer legal name |
| Status | The status of the merchant sub-contract customer, i.e. Active, Setup, etc. |
Service Application
Provides service application information from setup for the merchant account.

| Field Name | Description |
|---|---|
| Service | The type of service used in the merchant application set-up |
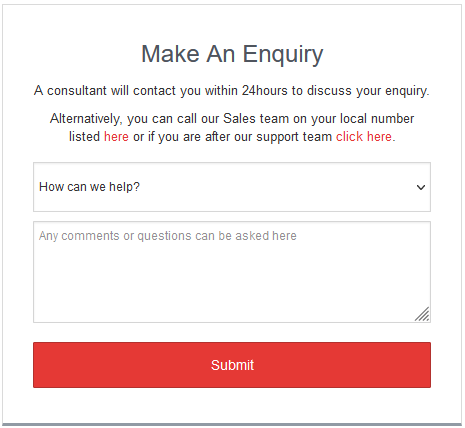
Enquiry
Using My Enquiry allows a merchant to create an enquiry directly from their Payline account. From the navigation menu, select CRM Management > My Enquiry.

From the 'How can we help' drop-down, select the option that best relates to your enquiry, enter any comments or questions and select Submit to send to the applicable Windcave team.
| Field Name | Description |
|---|---|
| Accounts Receivable | Select for information on Accounts Receivable, including help in paying an invoice or request special payment terms |
| Careers | Select for more information on career opportunities at Windcave |
| Integration | Select for more information on how to integrate to Windcave or for assistance resolving issues relating to an integration |
| Partnership | Select for more information on Commercial Partnership with Windcave for marking and/or referrals |
| Pricing/Sales | Select for more information on pricing and sales of Windcave products and services |
| Support | Select to contact the Windcave Support team for assistance, comments or queries related to production account issues. |
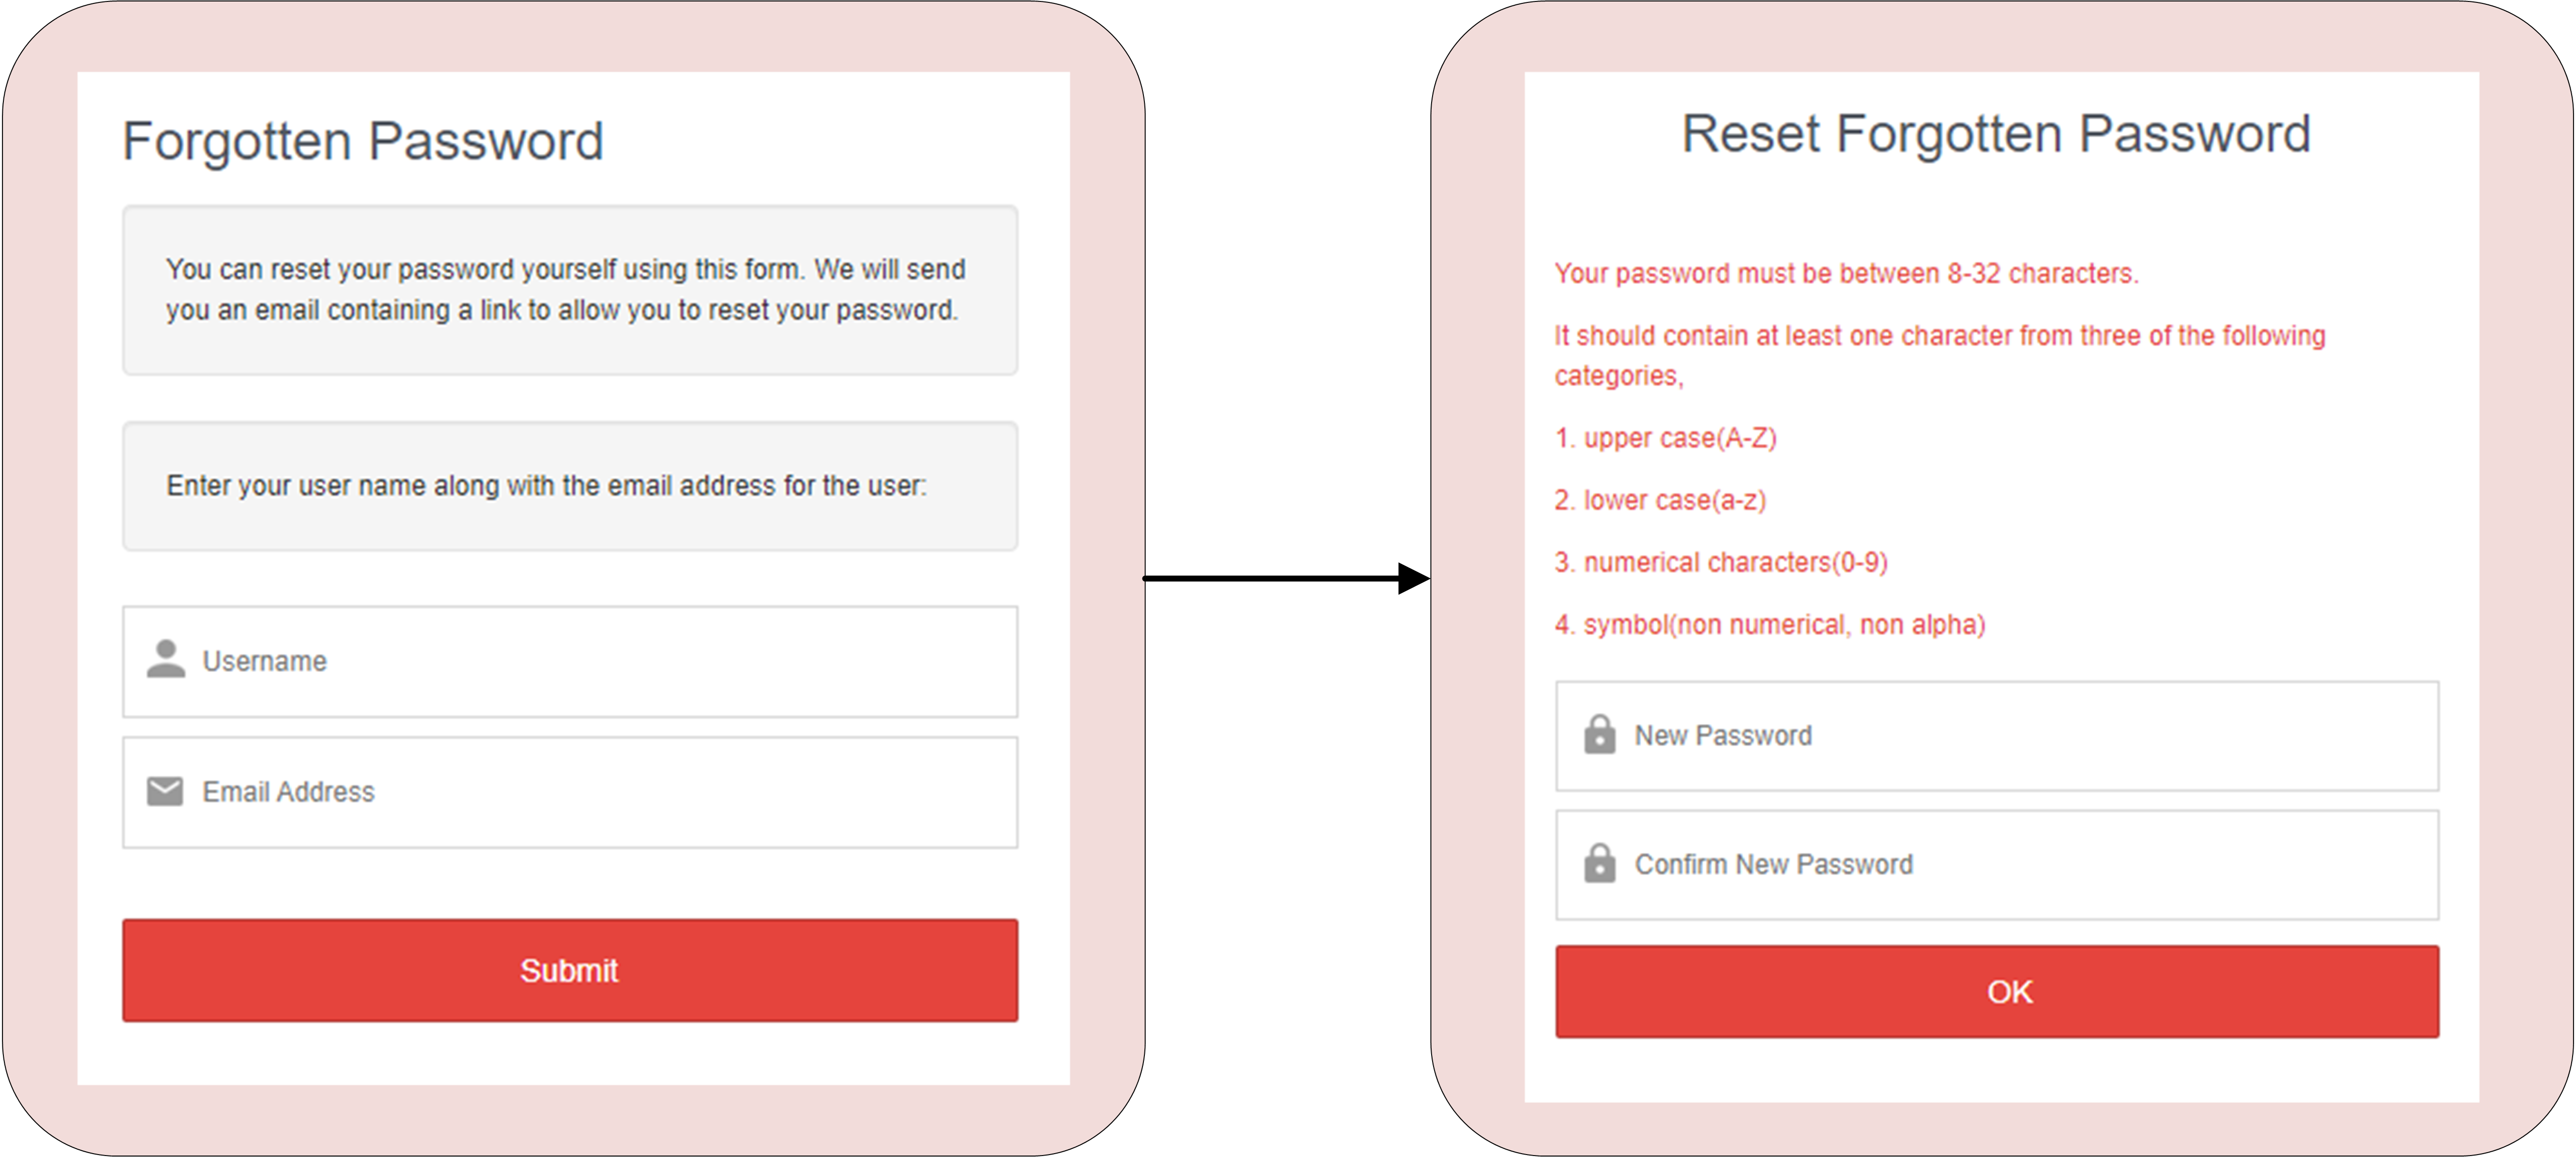
Password Reset
When selecting the Forgot your Password link, you will be prompted to enter your username and email address.
Once submitted, you will receive an email from [email protected] containing a link to a secure session for the password reset.
Create a new password that meets the password criteria listed and click OK to save and login into Payline.
2-Factor Authentication (2FA)
Two authentication options are available via TOTP (Time-Based One-Time Password) or SMS, both of which add an additional layer of security for your Payline account.
SMS Authentication
SMS authentication allows an alternative to add extra security to your Payline login. For more information, please contact the Windcave Support team.
TOTP Authentication
TOTP uses a 3rd-party application of your choice (e.g. Google Authenticator, Microsoft Authenticator, 1Password etc.) to generate a 6-digit code specific to your Payline account that changes automatically after a period of time.
When attempting to log into your Payline account, along with your username and password, you will be prompted to enter the authentication code currently displayed in your TOTP app.
Enabling TOTP Authentication
You can follow the below steps to enable TOTP Authentication on your Payline User
Login Troubleshooting
The below are common issues encountered and how to resolve them.
If you are still unable to login after trying the below, contact our Windcave Support team for assistance.
| Issue / Statement | Description | Resolution |
|---|---|---|
| Incorrect Username/Password. Please try again or follow link below to reset your password. | Incorrect Username or Password has been entered |
Check and re-enter your Username and Password. If error re-occurs, select the Forgot your Password link to reset your password 
|
| Max log in attempts reached. Please use Forgot Password button to continue and if you are unsuccessful please email [email protected] for further assistance. | The maximum number of login attempts has been reached |
If you know your password, please contact the Windcave Support team to reset the attempts. Alternatively, select the Forgot your Password link and reset your password.
|
The below troubleshooting examples are only applicable where TOTP has been enabled:
| Issue | Description | Resolution |
|---|---|---|
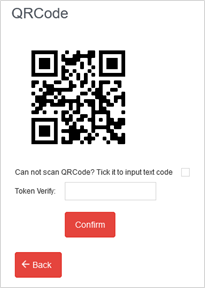
| TOTP Authentication - Unable to retrieve verification code | Authentication app is not retrieving a verification code |
On the Payline login screen:
|
| TOTP Authentication - Unable to access authentication app | The authentication app is unavailable or the Payline account cannot be linked/found. |
You will need to re-generate the QR Code to re-establish the link between the authentication app and Payline. Sign into Payline using the Can not input TOTP token option as above. Once you are logged in, follow the process below:
|
View / Search Transaction Records
Transaction Record Search
The transaction search is a real-time record of transactions processed on your Windcave account. For merchants with multiple Windcave accounts, the transactions visible are based on permissions of the Payline user.
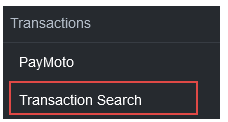
To search for a transaction, navigate to the Transactions >Transaction Search option. The below search criteria can be used to narrow down to a specific transaction.
| Parameters | Description |
|---|---|
| Card holder | The name value entered by the cardholder or read from the payment card |
| The email address provided by merchant shopping cart/Point of Sale system or cardholder when processing payment | |
| Phone Number | The phone number provided by merchant shopping cart/Point of Sale system or cardholder when processing payment |
| Card Holder Ip | The IP address of cardholder when processing payment (where cardholder IP has been provided) Note: This field may not be applicable to all integrations |
| Merchant Ref | The free text merchant reference that was used for a transaction request |
| Card Partial 6-4 | The first 6 and last 4 digits of the card number used to process the transaction |
| Card Partial 4 | The last 4 digits of the card number used to process the transaction |
| DeviceId | Merchant defined device identifier |
| CA Device | Serial number of Windcave card reader |
| CA Station | Device Name assigned by Windcave
By default this will be the serial number of the device, however can be customized upon merchant request. |
| AuthCode | Authorization code of the transaction |
| TxnRef | Unique per transaction reference provided by POS for each transaction |
| User | The username where the transaction was processed |
| DpsBillingId | DPS Billing ID or Transaction ID
The Billing ID is a reference that is unique to the merchant's customer that is associated with the credit card information stored securely at Windcave |
| BillingId | The Billing ID is a reference that is unique to the merchant's customer that is associated with the credit card information stored securely at Windcave |
| Payment Method | Payment method used in the transaction |
| Transaction Type | Transaction type of a transaction (eg Purchase, Auth Refund etc) |
| Authorized | Confirms if the transaction is authorized
0 = Not authorized 1 = Authorized |
| Card Mac | Method authentication code (Unique cryptographic card identifier) |
| Start Date / End Date | The start and end dates for the transaction search For example: Start date 18/05/2022, End date 01/06/2022 = Search will display all transactions between these two dates |
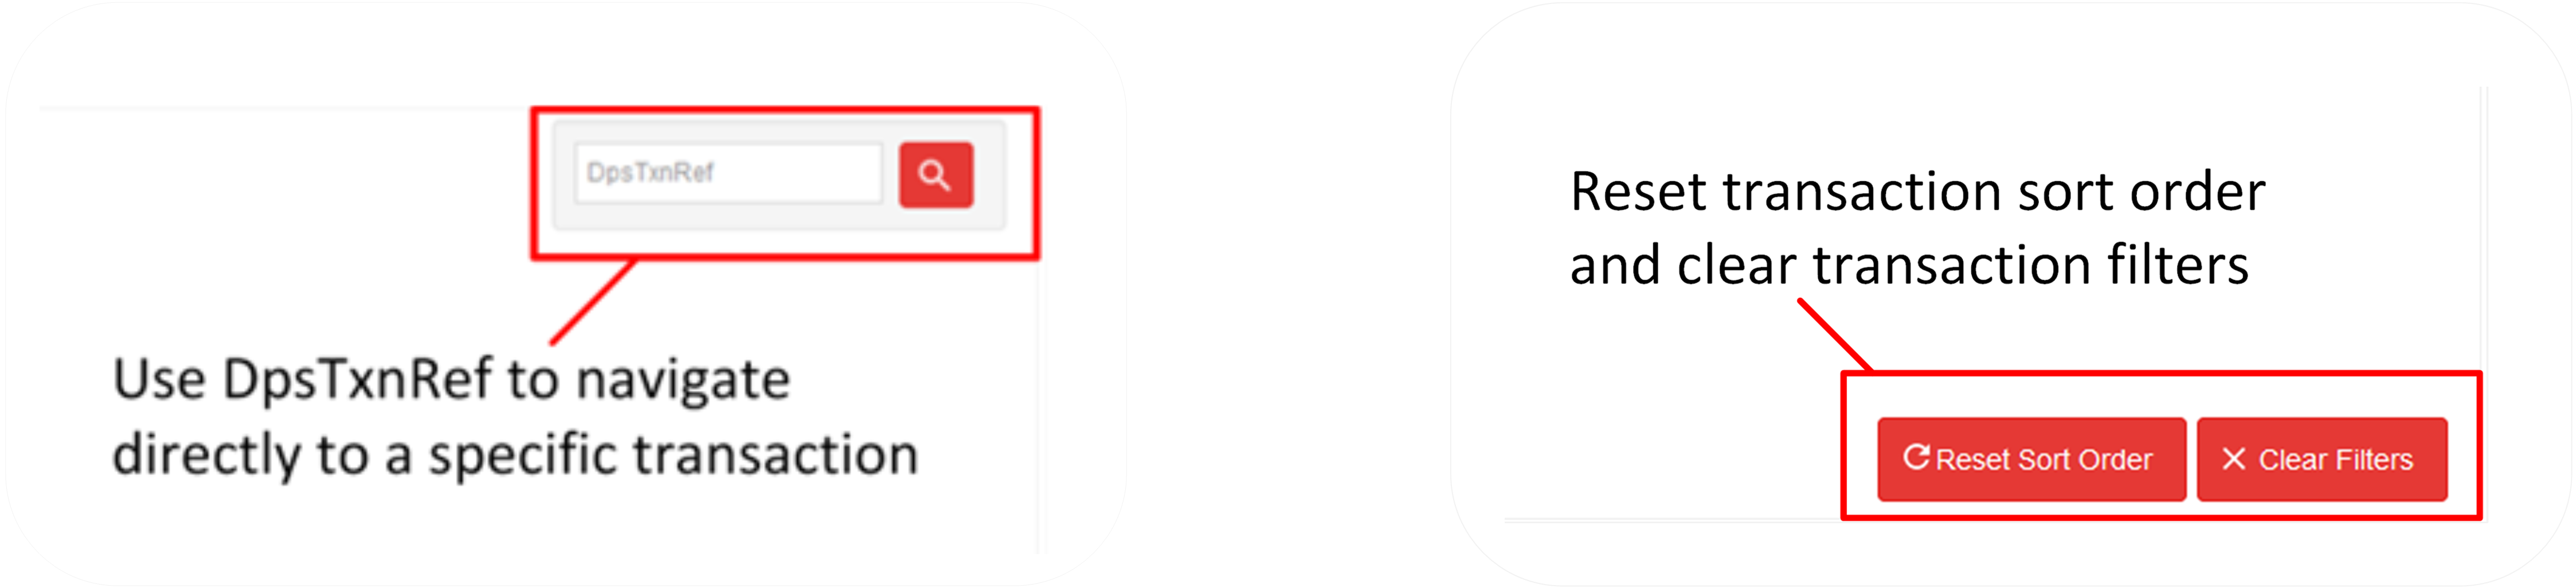
| DpsTxnRef | The Windcave unique transaction number, i.e. the transactionid (used for REST API integrations)
This can be used to search using the DpsTxnRef on the top right of the Transaction Query page  |
Tips:
- You can change the ordering of the transaction list to descending or ascending (by date) by selecting the DateTime toggle.
- You can also choose how many transactions are listed on the single page by editing the value in the “Max Rows” drop down menu.

- You can reset your sort order by selecting the “Reset Sort Order” button on the right-hand side of your screen.
- Copy and paste your “DpsTxnRef” into the corresponding field and hit “Enter” to navigate directly to your specific transaction.
Transaction Record Results
Search results will display with an overview of transaction information as below:
| Parameters | Description | ||||
|---|---|---|---|---|---|
| DateTime | The date and time of the transaction | ||||
| Group | The Group associated to the transaction | ||||
| Group Account | The Group Account associated to the transaction | ||||
| TxnType | The type of transaction, e.g.
Prch = Purchase Comp = Complete Auth = Authorization Void = Void Rfnd = Refund Validate = Validate IncrementalAuth = Incremental Authorization |
||||
| Amount | The total amount of the transaction | ||||
| Cur | The currency of the transaction | ||||
| Card Holder | The name on the credit card for the transaction | ||||
| CardNumber | The credit card number of the card holder | ||||
| Brand | The credit card brand used for the transaction (e.g. Visa, MC, Amex, EFTPOS) | ||||
| Response | The response code for the transaction. Explanation of the ReCo is usually provided in the Response | ||||
| Authorized | Confirms if the transaction is authorized
| ||||
| Merchant Ref | The free-text field submitted by the merchant during the transaction request | ||||
| DeviceId | Merchant defined device identifier | ||||
| Void | Displays whether the transaction is Void
| ||||
| Complete | Displays whether a pre-authorization transaction has been completed
|


Transaction Record
Selecting a transaction from the transaction search will bring up details related to that transaction.
Transaction
Provides general information about the details related to the specific transaction.
| Field Name | Description |
|---|---|
| DpsTxnRef | DpsTxnRef or transactionId for the transaction. |
| Transaction Date | The date and time of the transaction. The timezone of the user is shown in the brackets |
| Txn Type | The type of transaction (eg Purchase, Refund, Auth) |
| Payment Method | Payment method used in the transaction |
| Authorized | Confirms if the transaction is authorized 0 = Not authorized 1 = Authorized |
| ReCo | The response code for the transaction |
| Response Text | The response text to accompany the response code (ReCo) with additional information |
| Total Amount | Total amount and currency of the transaction |
| IP Address | The cardholder's IP address at the time of transaction. Note: This is not applicable to all transactions so may be empty |
Merchant Data
Provides general merchant data related to the specific transaction.

| Field Name | Description |
|---|---|
| Amount | The total amount and currency of the transaction |
| Amount Surcharge | The surcharge amount on the transaction (if applicable) |
| Amount (Cash) | The cash amount taken out on the transaction (if applicable) |
| Amount (Tip) | The tip amount on the transaction |
| Currency Exponent | The currency decimal places |
| Merchant Reference | The free-text field submitted by the merchant during the transaction request |
| TxnData1 | Custom merchant data field |
| TxnData2 | Custom merchant data field |
| TxnData3 | Custom merchant data field |
| Avs Action | The address verification service (AVS) action taken for transaction * Only applicable to merchants utilizing AVS |
| Product SKU | Product SKU (Stock Keeping Unit)
Allows specific rules to be set for the merchant that can trigger 3DS and Risk Management rules. This field will only populate if applicable. |
| Send Merchant Receipt | Entering an email address allows user to send a merchant receipt to the email addresses provided |
Customer
Contains customer data related to the specific transaction.

| Field Name | Description |
|---|---|
| Phone Number | The phone number provided by the merchant or cardholder during the payment process. |
| Avs Post Code | The AVS data post code |
| Avs Street Address | The street address of the customer |
| Shipping Details | The details provided by the merchant or cardholder during the payment process |
| Shipping Sender Postal Code | The merchant post code |
| Billing Details | The customer or company Billing Name / Address / Postal Code / Phone Number / Country |
| Language | The language used for the transaction (based on the Windcave settings for the username) |
| Send Card Holder Receipt | Entering an email address allows user to send a cardholder receipt to the email address provided |
Risk
Contains customer data related to the specific transaction.

| Field Name | Description |
|---|---|
| Rm reason | Risk management reason |
| Risk Score | Risk score of the transaction (based on the Windcave settings for the risk score profiles for the merchant) |
| Risk Score Text | Additional risk score information added for the transaction |
Account
Contains customer data related to the specific transaction.

| Field Name | Description |
|---|---|
| Username | The username used to action the transaction |
| Group Name | The group associated to the username and the transaction |
| Group Account Name | The group account associated to the transaction |
| Customer Name | The name of the merchant |
| ProductName | The product details set-up for the username. This allows a merchant to have a single Payline user who can create sessions for multiple products (done with group accounts) |
| Acquirer Name | Name of acquirer |
| Caid | Card Accepter ID (i.e. merchant ID) |
| Catid | Card Acceptor Terminal ID |
Acquirer
Contains customer data related to the specific transaction.

| Field Name | Description |
|---|---|
| Liability Indicator Name | The liability shift information |
| Acquirer Date Time | The date/time stamp from the acquirer for the transaction |
| Stan | The System Trace Audit Number |
| Acquirer ReCo | The Response Code from the acquirer |
| Acquirer Host Name | The name of acquirer used to process the transaction |
| Acquirer Response Text | The text associated to the transaction that has been entered by the acquirer (further description for the Acquirer Response Code (ReCo) |
Processing
Contains customer data related to the specific transaction.

| Field Name | Description |
|---|---|
| Client Type | The type code for client type used for transaction |
| Client Type Name | How the transaction was actioned (eg Internet) |
| PAN Entry Mode | How card was presented to payment terminal (eg MagStripe, ContactlessEMV, ContactEMV) |
| Void ReCo | The Response code if a transaction has been voided |
| Void DateTime (NZT) | The date and time on a transaction that has been voided |
| IP Address | The IP address of cardholder when processing payment (where cardholder IP has been provided) Note: This field may not be applicable to all integrations> |
| Server | The code of the Server used for the transaction |
| Server Name | The name of the Server used for the transaction |
| Applet Type | The application type for the transaction |
| Applet Version | The version number of the application type |
| SlotId | The Port slot ID |
| PxHost Id | The ID of the Windcave host used for the transaction |
| Transaction Id | The transaction identification number |
| Acquirer Host Name | The name of the acquirer host where the transaction was processed |
Result
Contains customer data related to the specific transaction.

| Field Name | Description | ||||
|---|---|---|---|---|---|
| Authorized | Confirms if the transaction is authorized
|
||||
| ReCo | The response code for the transaction | ||||
| Response Text | The response text to accompany the response code (ReCo) with additional information | ||||
| Acquirer ReCo | The Response Code from the acquirer | ||||
| Auth Code | The authorization Code assigned to the transaction - returned by the acquirer | ||||
| Stan | The response code for pre-processing completed before transaction | ||||
| Avs Result | CVC code result | ||||
| Date Settlement | Date of settlement of the transaction | ||||
| Acquirer Date Time | Date and time the acquirer actioned the transaction | ||||
| Liability Indicator Name | The liability shift information |
Refund Transactions
Contains customer data related to the specific transaction.

| Field Name | Description |
|---|---|
| RxDate column | Date and time of the refund associated with the transaction |
| Amount column | Amount that was refunded for the transaction |
| Merchant Reference | Reference entered at the time of refund |
FPRN
Contains customer data related to the specific transaction.

| Field Name | Description |
|---|---|
| Start Date column | Date and Time of the notification |
| Elapse column | Time in milliseconds that the notification was actioned |
| Attempts column | Number of attempts for the notification |
| Status Code column | Status code associated to the transaction notification |
| Success | Code whether the FPRN notification was delivered to the merchant 0 =Failed 1 =Success |
Reporting
Using Payline®, merchants can process “on demand” reports to view or download for specific date ranges and transaction types.
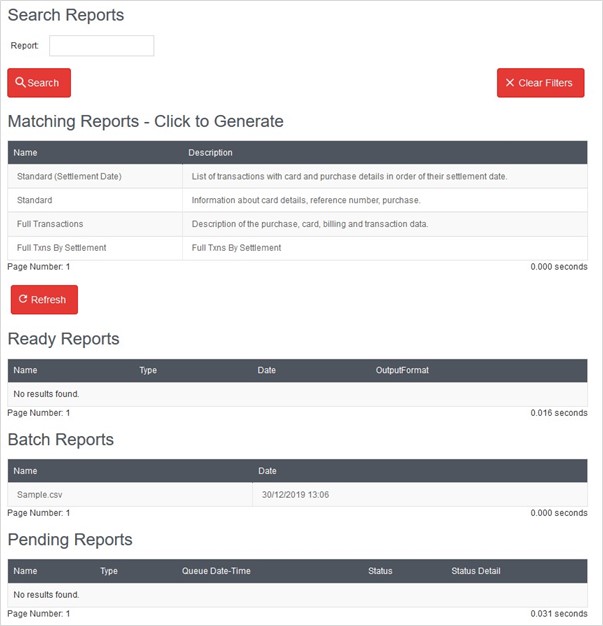
Navigate to Reports on the left-hand menu to view the Reporting options including:
- All available report types will be displayed at the top under “Matching Reports”.
- Any reports that are ready for viewing/download can be found under “Ready Reports”. Simply click the report to view/download.
- Any reports that are currently being processed will be shown under “Pending Reports”.
Tip: The page does not dynamically update so use the “Refresh” button to refresh the page (e.g., if you are waiting for a report in the pending report list, hit the refresh button after some time and if complete it will move to the ready report list).
Generate Report
From the Reports display page, simply click on the report you want to generate.
Fill in the required fields using the configurable parameters below to determine the type of report extract you need, then click “Add” to start generating the report.
| Parameter | Definition |
|---|---|
| Title | Free text field to enter a meaningful report name or reference |
| Name | Name of the report selected i.e., Standard, Standard (Settlement Date) |
| Username | Payline® username currently logged in |
| Email Report | Tick if you wish to have the report emailed (otherwise you can download) |
| Email address to email report to | |
| Start Date | The start date from which you would like to report on using the date (DD/MM/YYYY) and time (HH:MM) formats |
| End Date | The end date for which the report will be generated for using the date (DD/MM/YYYY) and time (HH:MM) formats |
| Group | The Group |
| Group Account | The Group Account (leave blank if you wish to generate report for all Group Accounts under the Group) |
| Purch
Auth Complete Refund |
Transaction types that you wish to have defined in your report |
You will be taken back to the main Reporting page and the report you have generated will sit under Pending Requests.

Processing Transactions
PayMoto
To improve the ease of use for Mail Order Telephone Order (MOTO) transactions within Payline, the transaction menus Purchase, Validate and Auth have been consolidated to a single PayMoto screen.
Navigate to Transaction > PayMoto using the navigation menu
Enter the details into the required fields using the parameters below and select Add to process the transaction
| Parameter | Definition |
|---|---|
| Txn Type | The type of transaction to be used:
|
| Amount | The amount you wish to bill the card for |
| Card Number | The credit card number of the card holder |
| Card Holder Name | The name on the credit card |
| Expiry Date | The expiry date of the credit card in MM / YY (month / year) format |
| Card Security Code | The non-embossed “security number” (3 digits for Visa / MasterCard, 4 digits for American Express). Please check with your bank if they support this feature |
| Card Holder Email | Email address of the customer |
| Save as Bill Card | When ticked a Windcave Token will be created, this token can be used to rebill this particular card |
| Merchant Reference | Free text field. Enter any meaningful reference. Commonly used for transaction tracking and reconciliation. This field is only seen by you (the merchant), not your customer (the card holder) |
| TxnData1/2/3 | The TxnData fields are free text fields that can be used to store information against a transaction |
Processing a Refund
You are able to process refunds to credit card holders without needing their customer’s credit card information. Refunds can be processed as many times as required, up to but no more than the original purchase amount.
To process a refund, click on the Transactions then Transaction Search menu items. You can search for the transaction either by searching date ranges, the merchant reference or full credit card number.
Select the transaction you wish to refund, select the Refund Transactions tab, then press the Refund button. You will now be presented with the screen to enter your refund parameters.

| Parameter | Definition |
|---|---|
| Amount | The amount to be refunded |
| Expiry Date | Enter a new expiry date - Used if the original credit card has expired, however the same credit card number has been retained |
| Card Holder Email | Enter if the credit card holder should receive a copy of the refund |
| Merchant reference | Free text field. Enter any meaningful reference. Commonly used for transaction tracking and reconciliation |
| User Password | Enter the Payline password for the username signed in and completing the refund |
Important Notes:
- Most banks also set a “daily refund limit” for each merchant. If you are a processing a relatively large refund and experience difficulties with them returning “declined”, contact your bank to find out what your daily refund limit is.
- You can refund a transaction more than once. You can submit multiple refunds up until the value of the original transaction. For example, if a transaction is processed for $90 you can submit any number of refunds up until the $90 mark – this could equate to 3 $30 refunds.
- If you are processing a refund and feel that you have entered all the fields above correctly but continue to get a “declined” transaction response, it may be that you are currently not configured by your bank for “refund” transaction types. Contact the merchant services department at your bank to enable this function.
Processing a Complete
You are able to process 'complete' transactions, by clicking on the Transactions then Transaction Search menu items. Simply search for a previously authorized transaction either by merchant reference, card number, card holder name or by date range.
Select the transaction you would like to process a complete for, then on the Complete Transactions tab press the Complete button. You will now be presented with the screen to enter your refund parameters.
| Parameter | Definition |
|---|---|
| Merchant Reference | Free text field. Enter any meaningful reference. Commonly used for transaction tracking and reconciliation |
| Amount | Enter the amount to complete the transaction for |
| Card Holder Email | Enter if the credit card holder should receive a copy of the complete transaction |
Batch Processing
The Batch Processor is an online automation client that allows merchants to process large volumes of credit cards quickly and easily simply by uploading a CSV (comma separated values) file.
To upload a batch file, select Other on the left-hand menu, then Batch Upload.
Click on Choose File to select the file you wish to upload and then on Upload File to upload.
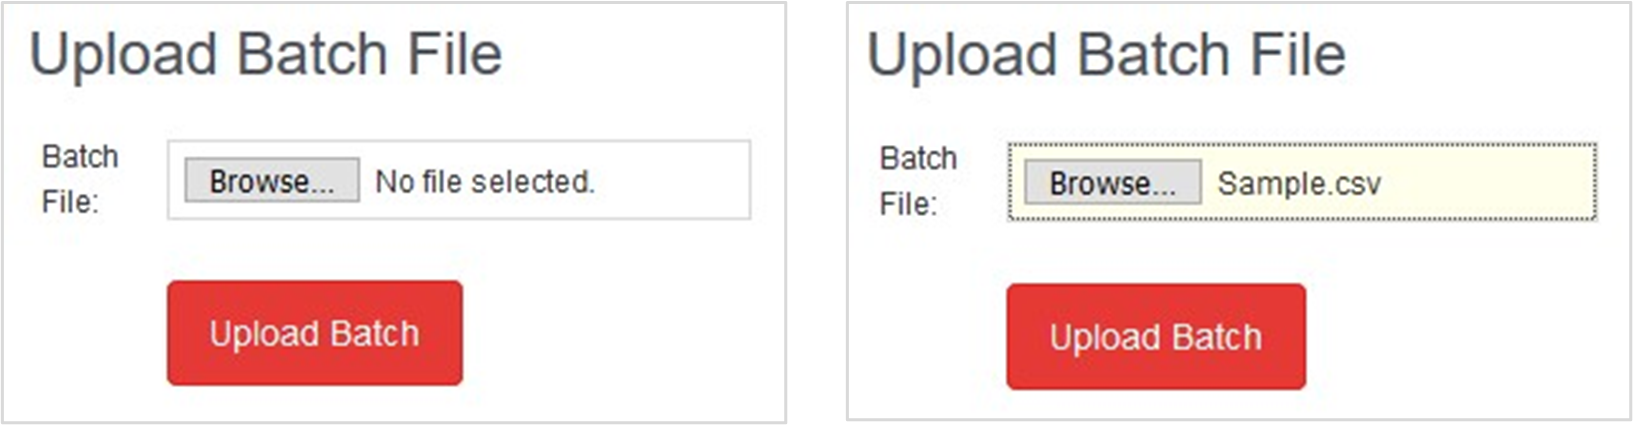
Once this file has been uploaded successfully, you will receive a confirmation message and a response batch file will appear under the “Reports” tab.

For more information on Payline batch formats and settings, please see Batch Processing here.
Recurring Billing
Payline® allows merchants to automate recurring transactions quickly, simply and most importantly securely eliminating the need to store sensitive credit card data.
Adding Cards
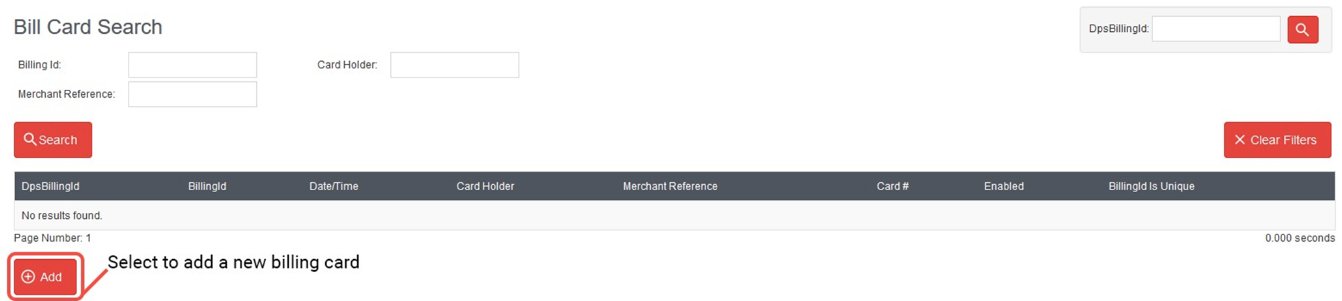
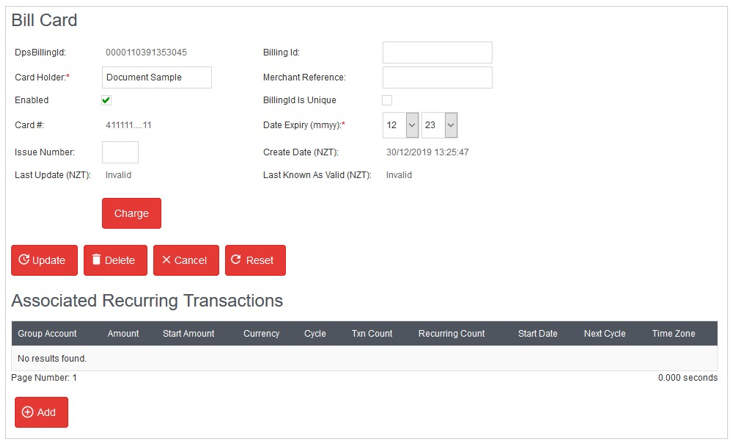
In order to establish automated billing on a card it needs to be added to the Payline® Billing Vault. Navigate to Bill Cards on the left-side menu, then select Add to add a new card.
| Parameter | Description |
|---|---|
| Billing Id | Billing ID that the first and subsequent transactions are referred to as
The Billing ID is a reference that is unique to the merchant's customer that is associated with the credit card information stored securely at Windcave |
| Card Number | The credit card number of the card holder |
| Card Holder | The embossed name on the credit card |
| Merchant Reference | Free text field. Enter any meaningful reference. Commonly used for transaction tracking and reconciliation |
| Enabled | Check to make the billing card live |
| BillingId is Unique | Check to indicate the BillingId is a unique value |
| Date Expiry | Expiry date of the credit card |
| Issue Number | If card has an issue number, it can be entered here |
One-Off Bill charge
Once you have completed the steps to add the Bill Card above, you can search for the card by selecting the Billing Cards option from the menu.
There are two ways to search:
- Enter the DpsBillingId you wish to charge and press the Enter key on your keyboard to automatically locate you bill card
- Use the merchant reference field and/or the Billing ID of the transaction, then select Search
Once you have found and/or selected the bill card you want to charge you can proceed to initiate a transaction by pressing the Charge button.
You will be presented a screen to specify the amount of the 'one-off charge'. Complete the required fields using the parameters below and select Add to complete.
| Parameter | Parameters |
|---|---|
| Merchant Reference | Free text field. Enter any meaningful reference. Commonly used for transaction tracking and reconciliation |
| Stored Card Indicator | Indicate the reason a card is being stored and/or charged for the transaction |
| Amount | Enter the amount for this one-off charge |
Setting up Recurring Billing
With a Bill Card added, you can now set-up a recurring payment. This means you can automatically configure the bill card to be charged for a specific amount, for a specified frequency and for a specified duration.
From the Bill Card you have set up, select Add under the Associated Recurring Transactions:

Recurring Transaction
| Parameter | Description |
|---|---|
| BillingId | The Billing ID is a reference that is unique to the merchant's customer that is associated with the credit card information stored securely at Windcave |
| Card Number | The masked credit card number of the card holder |
| Enabled | Checked confirms this recurring transaction is enabled (unchecked = disabled) |
| Amount | The amount to be re-billed |
| Start Amount | The merchant can bill an initial amount to the card (e.g., deposit amount). This payment will only be applicable for the first payment. Subsequent transactions will be billed based on the amount field above |
| Currency | The currency you would like to bill the customer in (only applicable to customers that currently have multi-currency options enabled) |
| Cycle | The frequency of the recurring payments |
| Recurring Count | The number of instances the card holder will be billed |
| Start Date / Time | The date and time from which the initial recurring payment will commence |
| Time Zone | The time zone that you want the billing card to be charged in |
| Merchant Reference | Free text field. Enter any meaningful reference. Commonly used for transaction tracking and reconciliation |
| Enable Invoices | Select this checkbox if Invoices should be sent for each recurring payment (This is sent to the User creating this recurring transaction and logged into Payline) |
| Retries Details | Important - Retries are only attempted if the 'Enable Invoices' option is checked |
| Retries Frequency | The frequency of the re-try attempts to process a payment, if the original payment has failed.
Select from the options in the drop-down:
|
| Retries Count | The number of retries to be completed at the frequency indicated if a transaction has failed.
Example: Frequency is set to Weekly / Retries Count is set to 3
The failed recurring transaction will be attempted weekly until approved or 3 attempts maximum. |
A result page will display once the recurring payment is added:

| Heading | Description |
|---|---|
| Group Account | The Group account the recurring transaction is associated to |
| Amount | The amount that is set as the recurring transaction |
| Start Amount | The amount that will be charged on the first transaction |
| Currency | The currency the recurring transaction will be billed as |
| Cycle | The frequency of the recurring transaction |
| Transaction Count | The current number of instances the recurring charge has been billed |
| Recurring Count | The number of instances the recurring charge will be processed - Once this number is reached, the recurring payments will automatically stop |
| Start Date | The date from which this recurring payment will start |
| Next Cycle | The next date and time which the recurring payment will be processed |
| Time Zone | The time zone that this recurring charge is billed against |